


Advanced NLP with spaCy: A free online course
This repo contains both an online course, as well as its modern open-source web framework. In the course, you'll learn how to use spaCy to build advanced natural language understanding systems, using both rule-based and machine learning approaches. The front-end is powered by Gatsby, Reveal.js and Plyr, and the back-end code execution uses Binder 💖 It's all open-source and published under the MIT license (code and framework) and CC BY-NC (spaCy course materials).
This course is mostly intended for self-study. Yes, you can cheat – the solutions are all in this repo, there's no penalty for clicking "Show hints" or "Show solution", and you can mark an exercise as done when you think it's done.


💬 Languages and Translations
| Language | Text Examples<sup>1</sup> | Source | Authors |
|---|---|---|---|
| English | English | chapters/en, exercises/en | @ines |
| German | German | chapters/de, exercises/de | @ines, @Jette16 |
| Spanish | Spanish | chapters/es, exercises/es | @mariacamilagl, @damian-romero |
| French | French | chapters/fr, exercises/fr | @datakime |
| Japanese | Japanese | chapters/ja, exercises/ja | @tamuhey, @hiroshi-matsuda-rit, @icoxfog417, @akirakubo, @forest1988, @ao9mame, @matsurih, @HiromuHota, @mei28, @polm |
| Chinese | Chinese | chapters/zh, exercises/zh | @crownpku |
| Portuguese | English | chapters/pt, exercises/pt | @Cristianasp |
If you spot a mistake, I always appreciate pull requests!
1. This is the language used for the text examples and resources used in the exercises. For example, the German version of the course also uses German text examples and models. It's not always possible to translate all code examples, so some translations may still use and analyze English text as part of the course.
Related resources
- 📚 Prefer notebooks? Check out the Jupyter notebook version of this course, put together by @cristianasp.
💁 FAQ
Is this related to the spaCy course on DataCamp?
I originally developed the content for DataCamp, but I wanted to make a free version to make it available to more people, and so you don't have to sign up for their service. As a weekend project, I ended up putting together my own little app to present the exercises and content in a fun and interactive way.
Can I use this to build my own course?
Probably, yes! If you've been looking for a DIY way to publish your materials, I hope that my little framework can be useful. Because so many people expressed interest in this, I put together some starter repos that you can fork and adapt:
- 🐍 Python:
ines/course-starter-python - 🇷 R:
ines/course-starter-r
Why the different licenses?
The source of the app, UI components and Gatsby framework for building interactive courses is licensed as MIT, like pretty much all of my open-source software. The course materials themselves (slides and chapters), are licensed under CC BY-NC. This means that you can use them freely – you just can't make money off them.
I want to help translate this course into my language. How can I contribute?
First, thanks so much, this is really cool and valuable to the community 🙌 I've
tried to set up the course structure so it's easy to add different languages:
language-specific files are organized into directories in
exercises and chapters, and other language specific
texts are available in locale.json. If you want to contribute,
there are two different ways to get involved:
-
Start a community translation project. This is the easiest, no-strings-attached way. You can fork the repo, copy-paste the English version, change the language code, start translating and invite others to contribute (if you like). If you're looking for contributors, feel free to open an issue here or tag @spacy_io on Twitter so we can help get the word out. We're also happy to answer your questions on the issue tracker.
-
Make us an offer. We're open to commissioning translations for different languages, so if you're interested, email us at contact@explosion.ai and include your offer, estimated time schedule and a bit about you and your background (and any technical writing or translation work you've done in the past, if available). It doesn't matter where you're based, but you should be able to issue invoices as a freelancer or similar, depending on your country.
I want to help create an audio/video tutorial for an existing translation. How can I get involved?
Again, thanks, this is super cool! While the English and German videos also include a video recording, it's not a requirement and we'd be happy to just provide an audio track alongside the slides. We'd take care of the postprocessing and video editing, so all we need is the audio recording. If you feel comfortable recording yourself reading out the slide notes in your language, email us at contact@explosion.ai and make us an offer and include a bit about you and similar work you've done in the past, if available.
🎛 Usage & API
Running the app
To start the local development server, install Gatsby
and then all other dependencies, then use npm run dev to start the development
server. Make sure you have at least Node 10.15 installed.
npm install -g gatsby-cli  # Install Gatsby globally
npm install                # Install dependencies
npm run dev                # Run the development server
If running with docker just run make build and then make gatsby-dev
How it works
When building the site, Gatsby will look for .py files and make their contents
available to query via GraphQL. This lets us use the raw code within the app.
Under the hood, the app uses Binder to serve up an image
with the package dependencies, including the spaCy models. By calling into
JupyterLab, we can then execute
code using the active kernel. This lets you edit the code in the browser and see
the live results. Also see my juniper repo
for more details on the implementation.
To validate the code when the user hits "Submit", I'm currently using a slightly
hacky trick. Since the Python code is sent back to the kernel as a string, we
can manipulate it and add tests – for example, exercise exc_01_02_01.py will
be validated using test_01_02_01.py (if available). The user code and test are
combined using a string template. At the moment, the testTemplate in the
meta.json looks like this:
from wasabi import msg
__msg__ = msg
__solution__ = """${solution}"""
${solution}

${test}
try:
    test()
except AssertionError as e:
    __msg__.fail(e)
If present, ${solution} will be replaced with the string value of the
submitted user code. In this case, we're inserting it twice: once as a string so
we can check whether the submission includes something, and once as the code, so
we can actually run it and check the objects it creates. ${test} is replaced
by the contents of the test file. I'm also making
wasabi's printer available as __msg__, so
we can easily print pretty messages in the tests. Finally, the try/accept
block checks if the test function raises an AssertionError and if so, displays
the error message. This also hides the full error traceback (which can easily
leak the correct answers).
A test file could then look like this:
def test():
    assert "spacy.load" in __solution__, "Are you calling spacy.load?"
    assert nlp.meta["lang"] == "en", "Are you loading the correct model?"
    assert nlp.meta["name"] == "core_web_sm", "Are you loading the correct model?"
    assert "nlp(text)" in __solution__, "Are you processing the text correctly?"
    assert "print(doc.text)" in __solution__, "Are you printing the Doc's text?"

    __msg__.good(
        "Well done! Now that you've practiced loading models, let's look at "
        "some of their predictions."
    )
With this approach, it's not always possible to validate the input perfectly – there are too many options and we want to avoid false positives.
Running automated tests
The automated tests make sure that the provided solution code is compatible with
the test file that's used to validate submissions. The test suite is powered by
the pytest framework and runnable test
files are generated automatically in a directory __tests__ before the test
session starts. See the conftest.py for implementation details.
# Install requirements
pip install -r binder/requirements.txt
# Run the tests (will generate the files automatically)
python -m pytest __tests__
If running with docker just run make build and then make pytest
Directory Structure
├── binder
|   └── requirements.txt  # Python dependency requirements for Binder
├── chapters              # chapters, grouped by language
|   ├── en                # English chapters, one Markdown file per language
|   |   └── slides        # English slides, one Markdown file per presentation
|   └── ...               # other languages
├── exercises             # code files, tests and assets for exercises
|   ├── en                # English exercises, solutions, tests and data
|   └── ...               # other languages
├── public                # compiled site
├── src                   # Gatsby/React source, independent from content
├── static                # static assets like images, available in slides/chapters
├── locale.json           # translations of meta and UI text
├── meta.json             # course metadata
└── theme.sass            # UI theme colors and settings
Setting up Binder
The requirements.txt in the repository defines the
packages that are installed when building it with Binder. For this course, I'm
using the source repo as the Binder repo, as it allows to keep everything in one
place. It also lets the exercises reference and load other files (e.g. JSON),
which will be copied over into the Python environment. I build the binder from a
branch binder, though, which I only update if Binder-relevant files change.
Otherwise, every update to master would trigger an image rebuild.
You can specify the binder settings like repo, branch and kernel type in the
"juniper" section of the meta.json. I'd recommend running the very first
build via the interface on the Binder website, as this
gives you a detailed build log and feedback on whether everything worked as
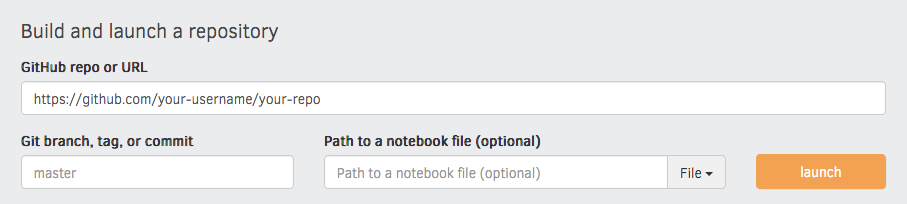
expected. Enter your repository URL, click "launch" and wait for it to install
the dependencies and build the image.
File formats
Chapters
Chapters are placed in /chapters and are Markdown files
consisting of <exercise> components. They'll be turned into pages, e.g.
/chapter1. In their frontmatter block at the top of the file, they need to
specify type: chapter, as well as the following meta:
---
title: The chapter title
description: The chapter description
prev: /chapter1 # exact path to previous chapter or null to not show a link
next: /chapter3 # exact path to next chapter or null to not show a link
id: 2 # unique identifier for chapter
type: chapter # important: this creates a standalone page from the chapter
---
Slides
Slides are placed in /slides and are markdown files consisting of
slide content, separated by ---. They need to specify the following
frontmatter block at the top of the file:
---
type: slides
---
The first and last slide use a special layout and will display the headline
in the center of the slide. Speaker notes (in this case, the script) can be
added at the end of a slide, prefixed by Notes:. They'll then be shown on the
right next to the slides. Here's an example slides file:
---
type: slide
---

# Processing pipelines

Notes: This is a slide deck about processing pipelines.

---

# Next slide

- Some bullet points here
- And another bullet point

<img src="/image.jpg" alt="An image located in /static" />
Custom Elements
When using custom elements, make sure to place a newline between the opening/closing tags and the children. Otherwise, Markdown content may not render correctly.
<exercise>
Container of a single exercise.
| Argument | Type | Description |
|---|---|---|
id | number / string | Unique exercise ID within chapter. |
title | string | Exercise title. |
type | string | Optional type. "slides" makes container wider and adds icon. |
| children | - | The contents of the exercise. |
<exercise id="1" title="Introduction to spaCy">

Content goes here...

</exercise>
<codeblock>
| Argument | Type | Description |
|---|---|---|
id | number / string | Unique identifier of the code exercise. |
source | string | Name of the source file (without file extension). Defaults to exc_${id} if not set. |
solution | string | Name of the solution file (without file extension). Defaults to solution_${id} if not set. |
test | string | Name of the test file (without file extension). Defaults to |
编辑推荐精选

小云雀
字节旗下AI内容创作Agent
小云雀是字节跳动旗下剪映团队推出的AI内容创作Agent,主打”一句话打造一个爆款”的零门槛创作体验。用户只需输入一句指令,可自动生成15-60秒短视频、数字人口播视频、风格化海报等内容,支持200+可商用数字人形象和19种语言及方言。小云雀核心功能包括智能成片、AI设计、照片会说话、爆款复刻等,已接入豆包大模型、DeepSeek Chat及自研Seedance 2.0视频生成模型、Seedream 5.0图像生成模型。目前支持安卓APP和网页版,每日登录可领取120积分。适合自媒体创作者、电商营销人员、教育工作者及普通用户使用,近期因用户量激增,视频生成排队时长可达8小时。


豆包
字节跳动旗下 AI 智能助手
字节跳动旗下 AI 智能助手

Pixmax
一站式AI短剧创作平台
Pixmax专注打造下一代“ AI 视觉创作引擎”,整合行业顶尖 AI 大模型、工工业级精准控制及企业级协同管理功能,是全方位的 AI 内容创作平台。

GPT Plus|Pro充值
GPT充值
支持 ChatGPT Plus / Pro 充值服务,支付便捷,自动发货,售后可查。
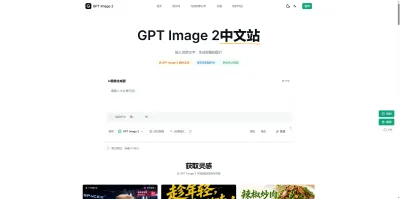

GPT Image 2中文站
AI 图片生成平台
GPT Image 2 是面向用户的 AI 图片生成平台,支持文生图、图生图及多模型创意工作流。

Vecbase
你的AI Agent团队
Vecbase 是专为 AI 团队打造的智能工作空间,将数据管理、模型协作与知识沉淀整合于一处。算法、产品与业务在同一平台无缝协同,让从数据到 AI 应用的落地更快一步。


音述AI
全球首个AI音乐社区
音述AI是全球首个AI音乐社区,致力让每个人都能用音乐表达自我。音述AI提供零门槛AI创作工具,独创GETI法则帮助用户精准定义音乐风格,AI润色功能支持自动优化作品质感。音述AI支持交流讨论、二次创作与价值变现。针对中文用户的语言习惯与文化背景进行专门优化,支持国风融合、C-pop等本土音乐标签,让技术更好地承载人文表达。

QoderWork
阿里Qoder团队推出的桌面端AI智能体
QoderWork 是阿里推出的本地优先桌面 AI 智能体,适配 macOS14+/Windows10+,以自然语言交互实现文件管理、数据分析、AI 视觉生成、浏览器自动化等办公任务,自主拆解执行复杂工作流,数据本地运行零上传,技能市场可无限扩展,是高效的 Agentic 生产力办公助手。
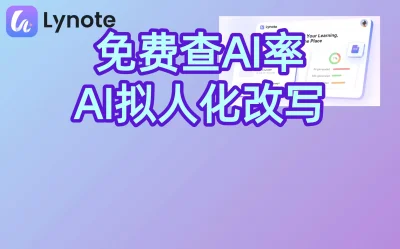

lynote.ai
一站式搞定所有学习需求
不再被海量信息淹没,开始真正理解知识。Lynote 可摘要 YouTube 视频、PDF、文章等内容。即时创建笔记,检测 AI 内容并下载资料,将您的学习效率提升 10 倍。


AniShort
为AI短剧协作而生
专为AI短剧协作而生的AniShort正式发布,深度重构AI短剧全流程生产模式,整合创意策划、制作执行、实时协作、在线审片、资产复用等全链路功能,独创无限画布、双轨并行工业化工作流与Ani智能体助手,集成多款主流AI大模型,破解素材零散、版本混乱、沟通低效等行业痛点,助力3人团队效率提升800%,打造标准化、可追溯的AI短剧量产体系,是AI短剧团队协同创作、提升制作效率的核心工具。

推荐工具精选


AI云服务特惠
懂AI专属折扣关注微信公众号
最新AI工具、AI资讯
独家AI资源、AI项目落地

微信扫一扫关注公众号